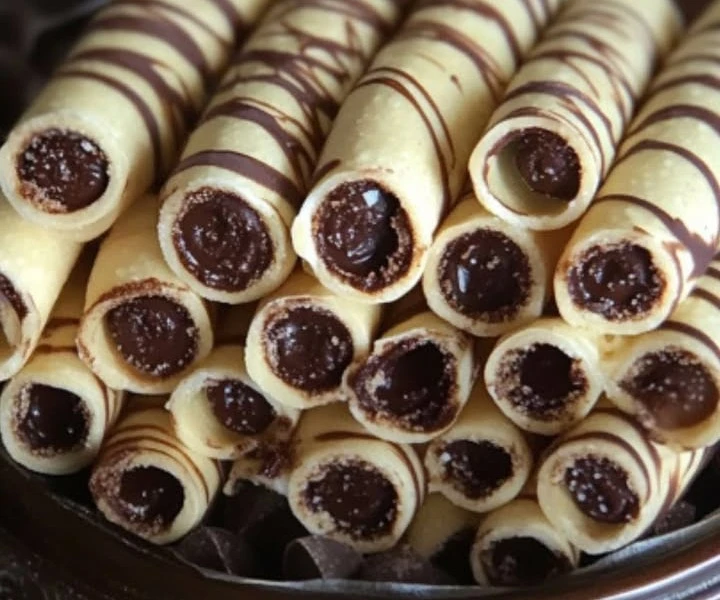
Homemade Chocolate-Vanilla Wafer Rolls Recipe
Introduction
Homemade Chocolate-Vanilla Wafer Rolls are a delicious snack that brings together the rich taste of chocolate and the sweetness of vanilla. These wafer rolls are crunchy and delightful, making them a perfect treat for any occasion. Whether you enjoy them as a snack or a dessert, they are sure to satisfy your sweet tooth and brighten your day. With simple ingredients and straightforward steps, you can create these delightful wafer rolls right in your kitchen.
Why you’ll love this recipe
You’ll love this recipe for several reasons. First, it is easy to follow, making it perfect for bakers of all skill levels. Second, the combination of chocolate and vanilla flavors is a classic that appeals to everyone. These wafer rolls are also versatile; you can customize them by adding your favorite fillings or toppings. Furthermore, they are great for sharing with family and friends during gatherings or as an afternoon snack. Once you try making these wafer rolls at home, you’ll never want to go back to store-bought snacks!
How to prepare Homemade Chocolate-Vanilla Wafer Rolls
Creating your own Homemade Chocolate-Vanilla Wafer Rolls is an enjoyable process. In just a few steps, you can prepare the batter, bake the rolls, and enjoy your finished treats. Here’s a breakdown of what you will need to know to make these delicious wafer rolls.
Ingredients:
For the Vanilla Batter:
- 1/4 cup all-purpose flour
- 1/4 cup sugar
- 1/8 cup unsalted butter, softened
- 1/4 tsp vanilla extract
- 1 egg white
- Pinch of salt
For the Chocolate Batter:
- 1/4 cup all-purpose flour
- 1/4 cup sugar
- 1/8 cup unsalted butter, softened
- 1/4 cup cocoa powder
- 1 egg white
- Pinch of salt
Instructions:
Preheat Your Oven: Begin by preheating your oven to 350°F (175°C). This ensures your wafer rolls bake evenly.
Prepare Baking Sheets: Line two baking sheets with parchment paper. This prevents the rolls from sticking and helps you take them off easily after baking.
Make the Vanilla Batter: In a bowl, mix together the flour, sugar, and salt. Add the softened butter and vanilla extract, and mix until smooth. Then, fold in the egg white gently until everything is combined.
Make the Chocolate Batter: Repeat the same process for the chocolate batter. Combine the flour, sugar, cocoa powder, and salt in a bowl. Add the softened butter and mix well. Finally, fold in the egg white until the mixture is smooth.
Create Wafer Rolls: Using a piping bag or a spoon, drop small amounts of the vanilla batter onto one prepared baking sheet. Do the same with the chocolate batter on the other sheet. Make sure to space them out, as they will spread while baking.
Bake the Rolls: Place the baking sheets in the preheated oven. Bake for about 10-12 minutes, or until the edges start to turn golden brown. Keep an eye on them, as they can burn quickly.
Shape the Wafer Rolls: Once baked, remove the sheets from the oven. Allow the wafers to cool for a few minutes, then carefully roll them into tube shapes while they are still warm and pliable. You can use a wooden dowel or your fingers to help shape them.
Cool Completely: Place the rolled wafer rolls on a wire rack to cool completely. This step is essential to ensure they firm up.
Enjoy Your Treats: Once cooled, your Homemade Chocolate-Vanilla Wafer Rolls are ready to be enjoyed!
How to serve Homemade Chocolate-Vanilla Wafer Rolls
These wafer rolls can be served as they are or with a variety of dips. You can fill them with whipped cream, ice cream, or a fruit filling for extra flavor. To make a stunning dessert presentation, arrange them on a platter with some fresh berries or drizzle chocolate sauce over them. They also make an excellent accompaniment to coffee or tea, adding a sweet crunch to your beverage.
How to store Homemade Chocolate-Vanilla Wafer Rolls
To keep your Homemade Chocolate-Vanilla Wafer Rolls fresh, store them in an airtight container. If you keep them at room temperature, they will stay crunchy for several days. If you want to keep them longer, you can store them in the refrigerator, but this may change their texture slightly.
Preparation tips for Homemade Chocolate-Vanilla Wafer Rolls
- Use Fresh Ingredients: Ensure your baking ingredients are fresh to achieve the best flavor.
- Roll While Warm: Make sure to roll your wafers while they are still warm; this makes them easier to shape and prevents them from cracking.
- Experiment with Fillings: Don’t hesitate to try different fillings or toppings. Nutella, fruit preserves, or even whipped cream can make tasty additions.
- Make Mini Rolls: If you want bite-sized treats, you can pipe smaller amounts of batter to create mini wafer rolls.
Variation (if applicable)
If you want to add a twist to your Homemade Chocolate-Vanilla Wafer Rolls, try adding spices or extracts to the batter. For example, you could add a pinch of cinnamon to the vanilla batter or some peppermint extract for a refreshing flavor. Another variation could include stuffing the rolls with flavored creams or custards, allowing for a unique taste experience.
Frequently asked questions
1. Can I use different flavors?
Yes! You can easily customize the flavors of your wafer rolls by adding different extracts or using flavored cocoa powder.
2. How do I prevent the wafer rolls from becoming soft?
Make sure to store your wafer rolls in an airtight container and keep them at room temperature. Avoid refrigeration as it can cause them to soften.
3. Can these wafer rolls be frozen?
Yes, you can freeze the baked and cooled wafer rolls. Just make sure to place them in a freezer-safe container or bag, and they can last for up to a month. When ready to eat, let them thaw at room temperature.
Now that you have this easy and delightful recipe for Homemade Chocolate-Vanilla Wafer Rolls, it’s time to gather your ingredients and start baking! Enjoy making these scrumptious treats for yourself and your loved ones. Happy baking!